Your cart is currently empty!

MAKE IT DIY: Plant Pots
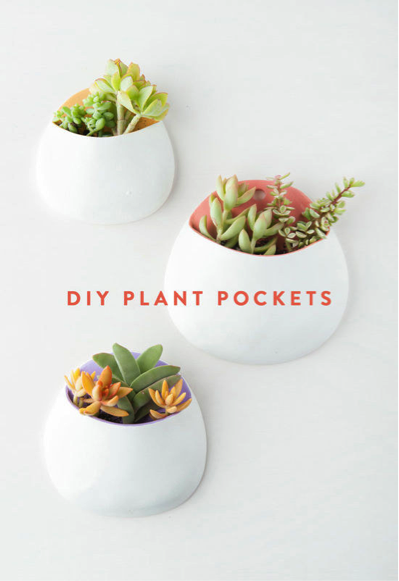
Plant Pockets –
This DIY project comes from designlovefest.com. This project caught my eye because it only requires a few tools and materials and gives you an easy way to use up some bare wall space. For those with small apartments, and not a lot of floor space for potted plants, this project leaves you with some awesome home-made hanging planters so you can give your space some well-needed green vibes. All you need is a container of air dry clay, and some molding and shaping tools to create a wall pocket in any shape you choose. You can then paint the pockets any design your heart desires to give these guys a little pop of pizazz. You can plant any variety of foliage in your hanging potters; this project used succulents because they require less water and maintenance. So easy, and so adorable, look at you with your green thumb!

Skyscraper Planter –
If you’ve ever wanted an edgier way for your plants to live their life, check out this sky-high planter. You can pop over and find the full tutorial at Monstercircus, she has plenty of awesome DIY projects for endless amounts of trips to the craft store. For this DIY potted plant, you’ll need to be a tad construction savvy but she has full explanations and step by step instructions on how to complete your planter. The great thing about this raised planter is that it’s adjustable, allowing you to choose the height of your pot, or add on multiple levels for a different aesthetic. Be sure to check out the similar posts on the bottom of the tutorial to see some of her other innovative planter DIYs!

Textured Planter –
This project is great if you have old pots that have seen better days and gathering spiders in a dark corner somewhere. Add some extra oomph to those ho-hum planters and give them new life with this simple tutorial from designsponge. This DIY is ideal for beginners, all you need is a little creativity and some fun small objects you can find around the house. Using quick-set epoxy simply attach small trinkets like corks, marbles, or beads to the outside of the pots. Then when the epoxy has set, just paint the pots your desired color to create a very trendy anthropologie-esque home for your leafy friends.

Baby Food Jar Wood Vase and Candleholder –
If versatility is you deciding factor in décor, I have the project for you. This amazing DIY comes from Laura at Make Life Lovely, and was featured on goodhousekeeping.com. Laura created this unique piece with only baby food jars, clamps, and two hooks at the top to hang it. These little jars make display easy for anything from succulents, to candles, or even snipped buds from the garden. A little variation in the size of the jars also allows you to fill them with different objects or foliage. The larger jars are great for plants or small bouquets, while the smaller ones are good for pebbles, shells or votive candles. This particular project used some old wood, but any backdrop that can be drilled into will work. Get creative and use an old pallet or driftwood, pull out the metallic spray paint and stencils and get to it. The versatility of this piece is endless!

Tree Branch Flower Pot –
Feeling green? Go outside and find some small tree branches to use for this nature loving DIY. Find an old coffee pot or soup can depending on your preferred pot size. Then wrap the container with fabric, this tutorial uses burlap, but any fabric can be used, just make sure you don’t mind a little bit of the fabric peeking through. Once you’ve done that, cut your branches down to size. They don’t have to be perfectly even, just tall enough to cover the height of your container when standing vertically and wrap around entire circumference. Next use twine woven between the branches at the top and at the bottom, be sure to pull the twine tight so the branches are as close together as possible, make a knot to secure and leave a few feet of extra twine on the end. Wrap the woven branches around the outside of your container; this may take some tweaking and adjusting as the branches shift. Wrap the leftover feet of twine back around the pot and branches and tie with a double knotted bow to secure everything.

Whether you’re looking to just spruce up an old pot, or to gain your gain your green thumb, these DIY projects are sure to be a fun and creative way to bring some outside inspiration into your living space. Show us your successfully completed planter (or your DIY Fail, we don’t judge!) Happy Planting!
xoxo Amanda!
